
Tagging the Tracks
 |
 |
 |
 |
 |
 |
 |
First thing I am going to do is tag the tracks. To make my life easier I will select all of the mesh objects that will be part of the tracks and hide the rest of the objects from view. To do this I use the select by name button. It has an arrow with several little lines running horizontal next to it:
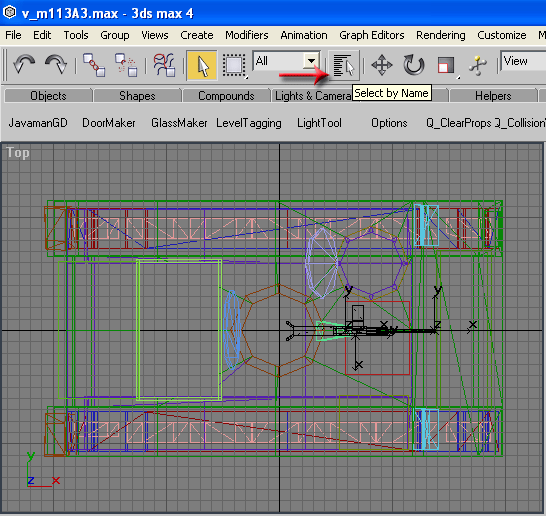
After you click this button you will get a dialog box like this:

Simply Left-Click on the name to select an object; use Ctrl+Click to select multiple objects that are not adjacent to each other. Now that I have all of my mesh objects selected that I want to use, I click on Select to close this window. Next step is to maximize my top viewport and switch to wireframe. To do this click on the little button in the lower right hand corner "Min/Max toggle" then right click on the viewport in the upper left hand corner to bring up a pop up menu. Select Views>Top. Then right click on it again and select Wireframe. Here is a picture of what you should see now:

Note: All Helper Points must be placed in the top viewport. Do Not Clone Helper Points. Place them manually.
Now go ahead and select the Display tab (Top Arrow) followed by the Hide Unselected Button (Bottom Arrow) as depicted below:
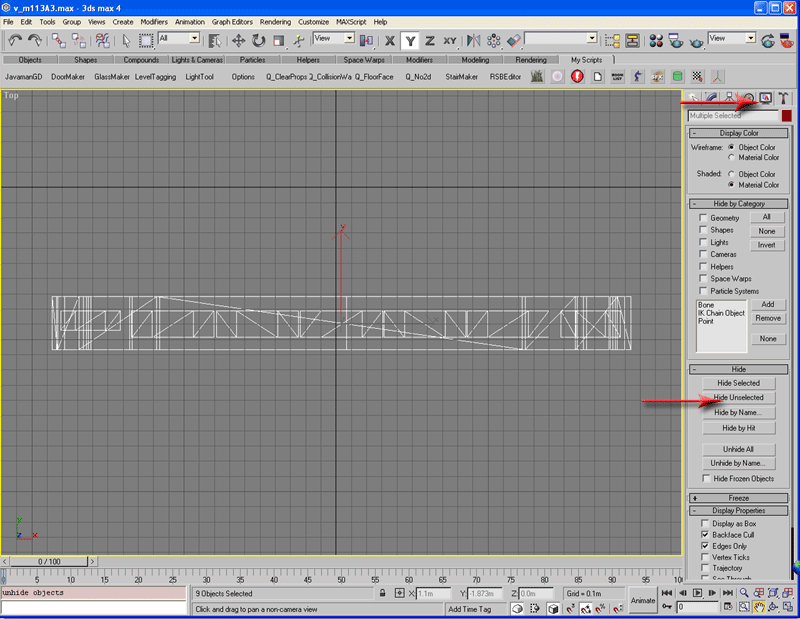
We are going to need 3 helper points for this track group and 3 for the one on the other side. Each track needs two contact points and one helper point to group all of the mesh with. Click on the Create Tab, then the Helpers Button, followed by the point button. Use the picture below for reference:

Next place your first Helper Point into the Scene close to it's final postiton. I will switch to a Back or Front viewport to adjust it in a minute. Name your Helper Point ^contactpoint0 as in the picture below:
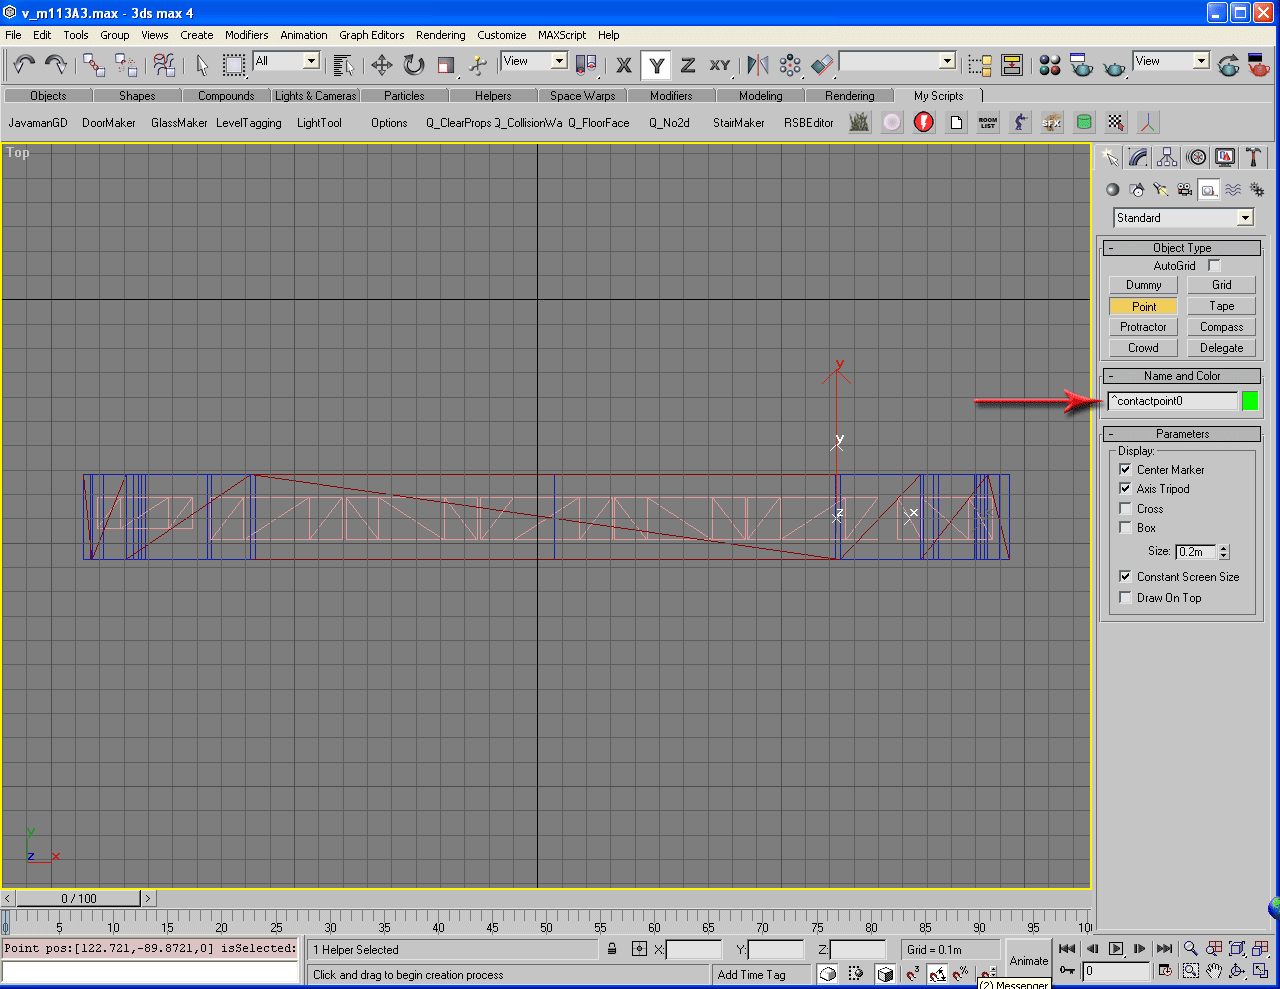
Repeat this process for the second Helper Point as displayed here:

Now I am going to switch to the Back Viewport and adjust the horizontal and vertical positioning of my helper points. Once you are done it should look like this:
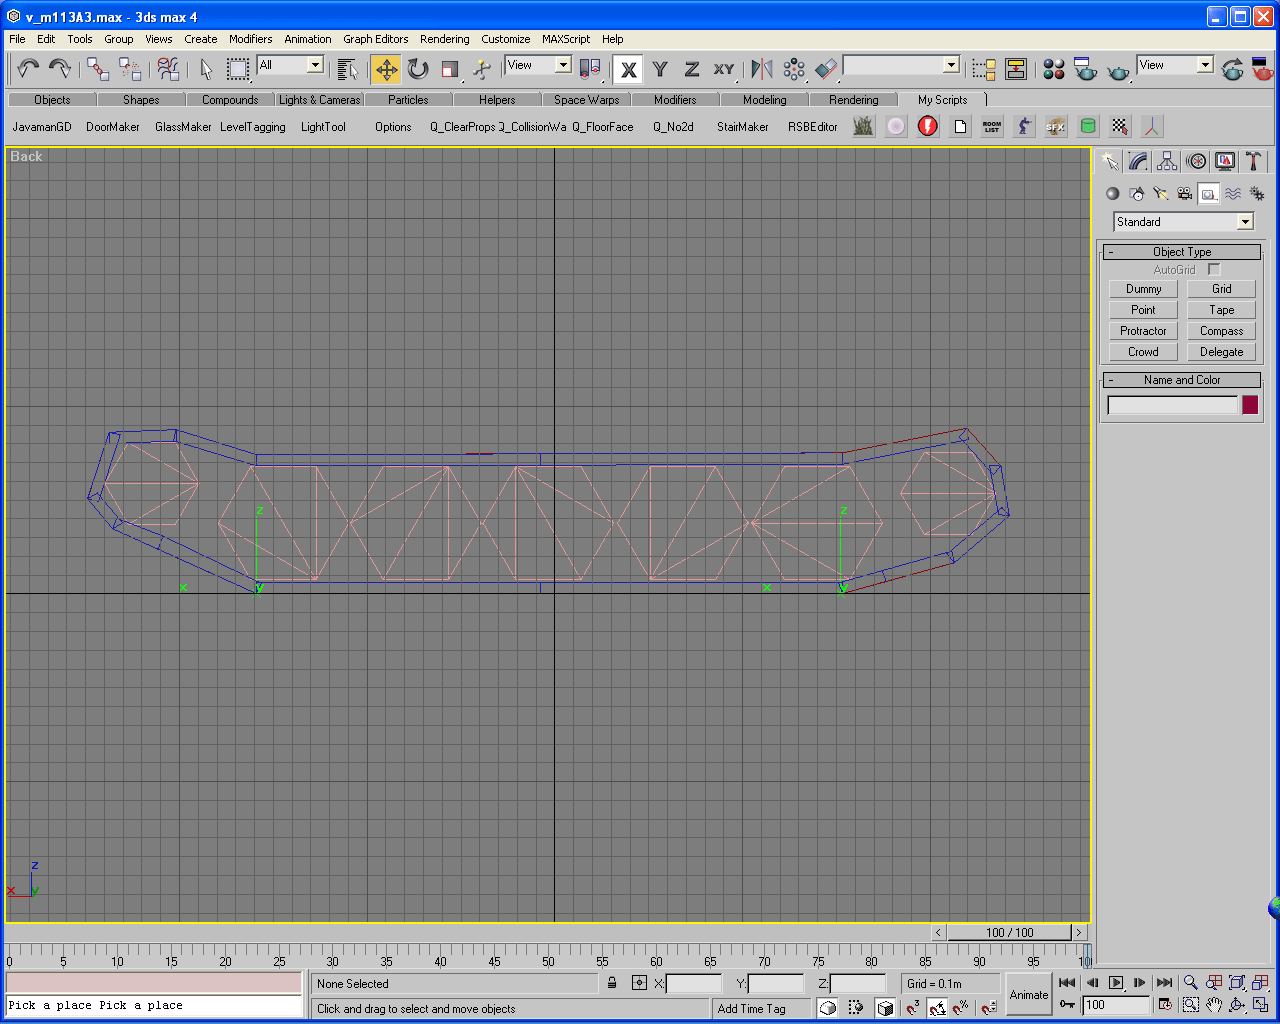
The next step is to add the Helper Point for the Track Group. Switch back to the Top viewport and add a Helper point in the center of the tracks as I have done here:

Note: The first character in this tag must be a capital O.
Check its postion in the Back viewport and adjust it as needed so it looks like this:

We are almost finished tagging the right side tracks. Now select all of mesh and helper points for the track. Go up to the group menu and select Group. In the Group dialog box type in the name of the group as follows: <n><righttrack>M113
Note: Substiute the name of your vehicle for the name "M113" in your groupings.
View the picture below for reference:

Hit okay and you are done with this group. Now you have to repeat the process for the other side with the exception of naming the group. Name the left track group <n><lefttrack>M113. Once you are done with that we are ready to continue on to the next phase.
|
|
|
|
|
|
|
Tom Clancy's Ghost Recon is a trademark of Rubicon, Inc. under license to Ubi Soft Entertainment.
Ghost Recon is a trademark of Ubi Soft Entertainment.