After I have finished the tracks, I went ahead and jumped into the Front viewport and unhid everything. Then I selected the Ramp mesh so I can get a good look at what I am going to be working with. This door has a hinge on the bottom so it is going to get a little tricky here getting the exact position that I need. I don't know if it matters but I want the Helper Point to co-exist on the same plane as my pivot point for the door.
The first thing that I want to do is line my pivot point to the hinge that the door will swing from. That is the reason that I chose the Front viewport. This can vary depending on which way that your door swings and it's location on the vehicle. A normal door that opens and closes on the horizontal plane can have it's pivot point adjusted from within the top viewport. You'll just have to think about it depending on your particular case.
To line your pivot point to the hinge follow these simple steps:
1. Click on the Hierarchy tab. Make sure the Pivot button is selected.
2. In the Adjust Pivot rollout, Select the Affect Pivot Only button.
3. Click on the Center to Object button.
(If you make a mistake just hit the Reset Pivot button.)
4. Now use the Select and Move tool to align the Pivot point to be co-planar with your hinge.
(In my case, I will have to move it both horizontally and vertically to get it exact. Zoom in as much as you need to get it right.)
5. Right-Click on the Select and Move Tool to make note of the exact positon of the Pivot point.
Check out the picture below to get an idea of what it is that I have done.
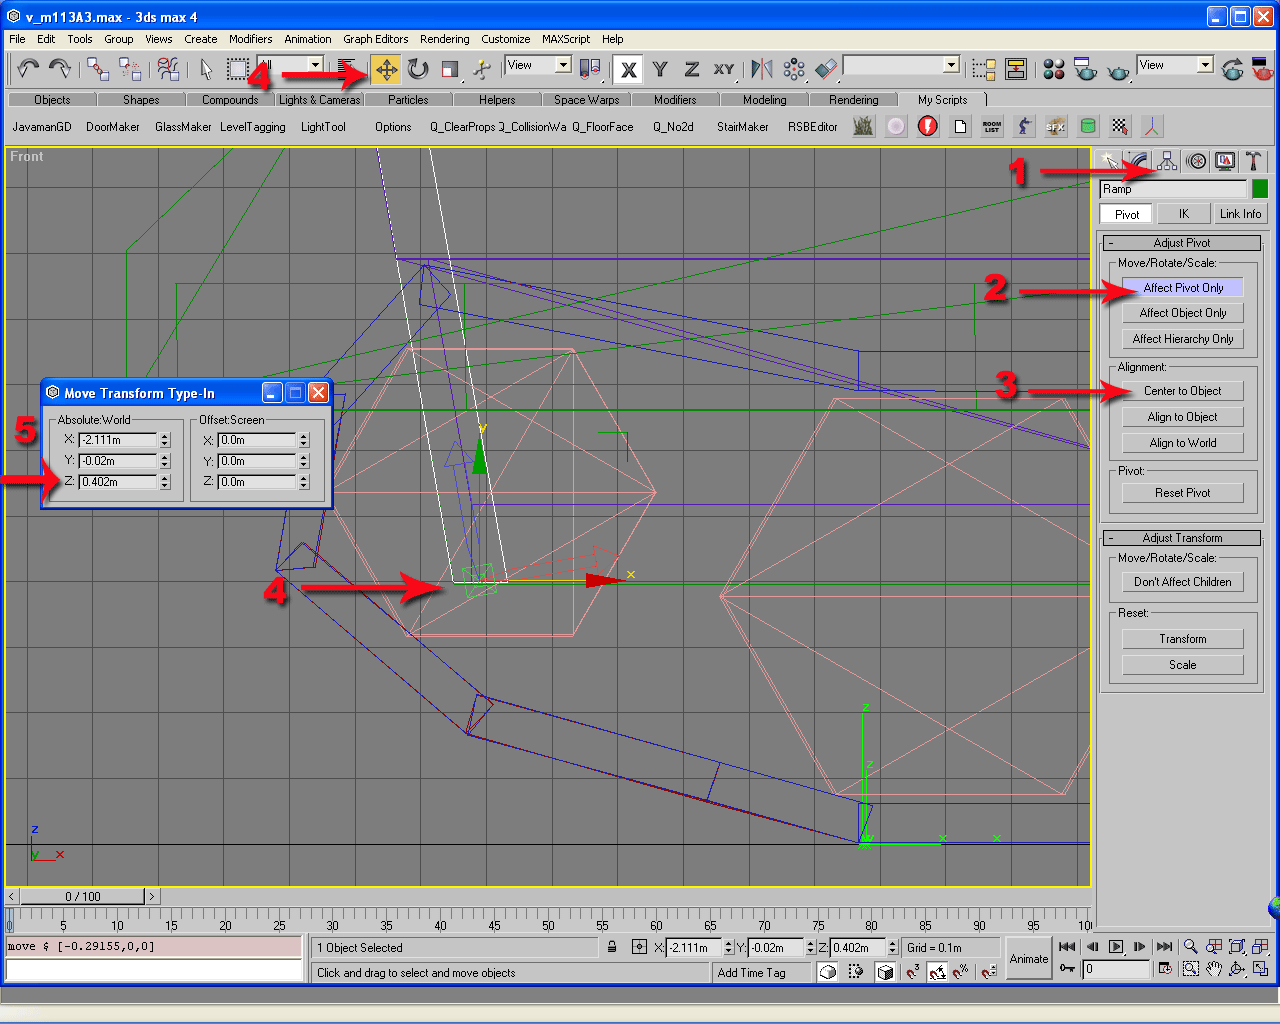
6. Click on the Affect Pivot Only button to deselect that option.
7. If you are not in the Top Viewport then switch back to it to place the helper point.
There isn't any glass in this vehicle so I won't be covering it here. You will have to place a helper point with your glass mesh and group that as <n><glass>doorname. Then go into the Map Editor and tag it as glass.
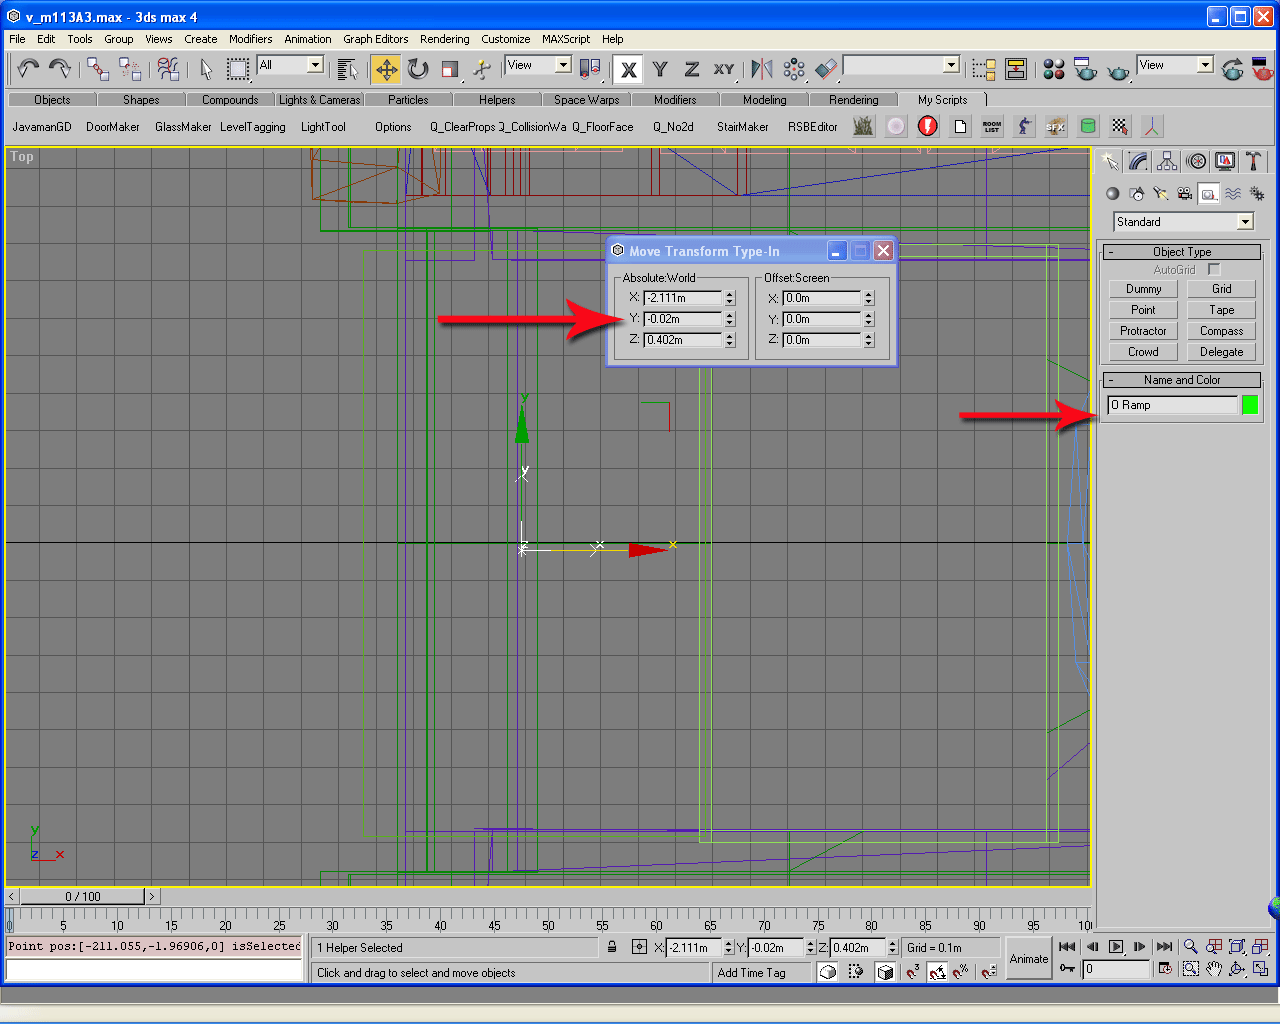
Now back to the Top viewport with my Ramp Mesh selected... I am going to attempt to place my Helper Point right on top of the pivot point. I have zoomed in pretty close to get here. Once I place the Helper point, I name it O Ramp. That is a capital O. The "Ramp" is so I can identify it. Next I will Right-click on my Select and Move Tool button to enter the exact position of the Helper Point.
Refer to the picture below:
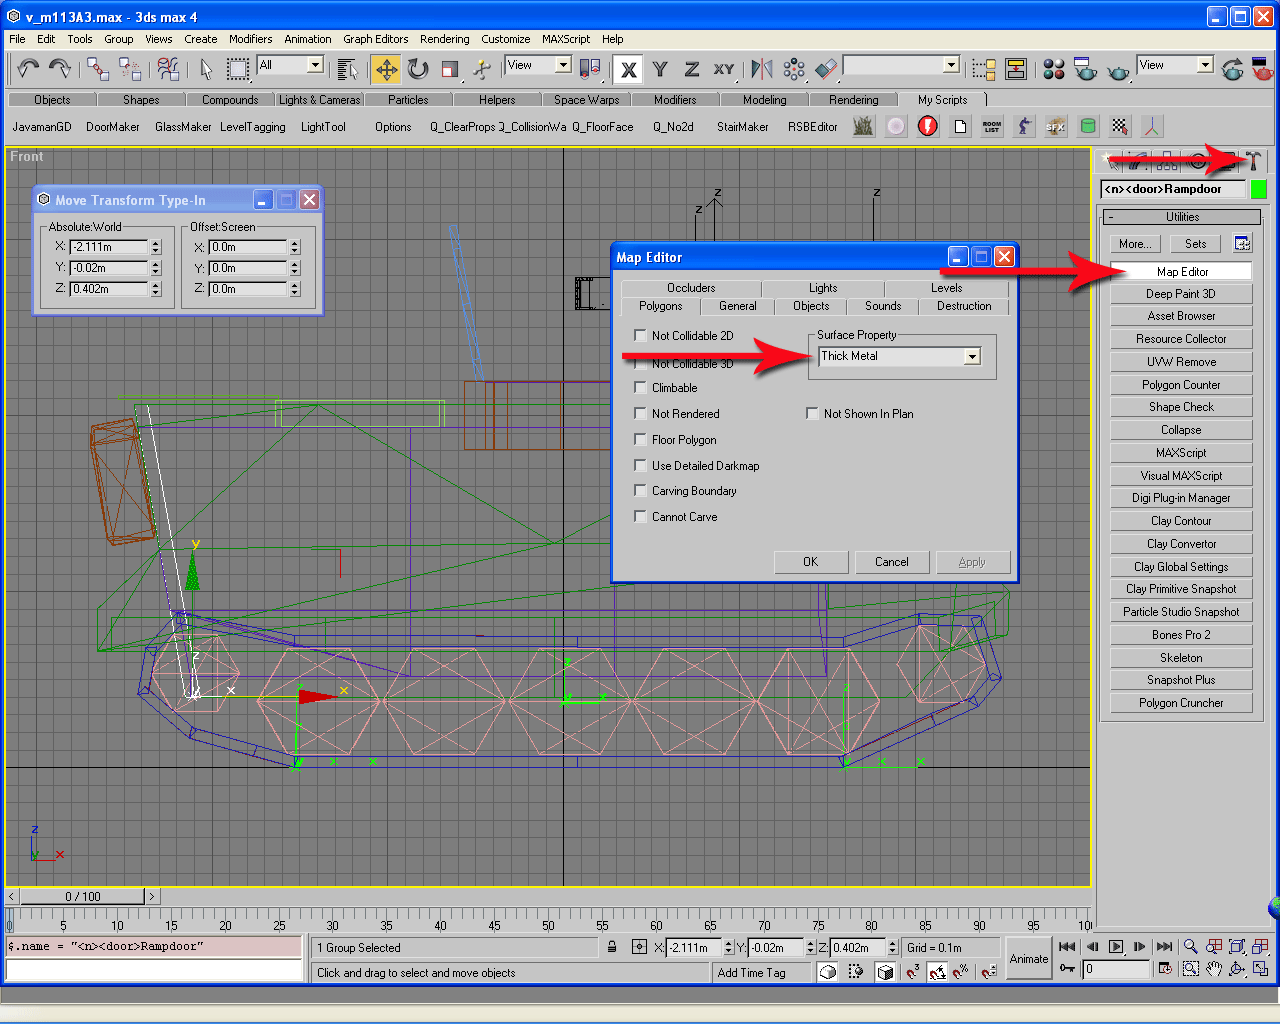
Next step is to group the door mesh and it's Helper Point. Remember to include your glass mesh if you have it. Name the group <n><door>Rampdoor. Substitute your door name for the word "Ramp". The Pivot point may move to the center of the object. If it does you will need to move it back to the positon of the Helper Point. Then open the Map editor. I have mine on a default button on the Utility tab.
I have given my Ramp a Surface property of Thick Metal as depicted below:

Now we are ready to animate the door. First thing you want to check is that all of your animations are set up to be linear.
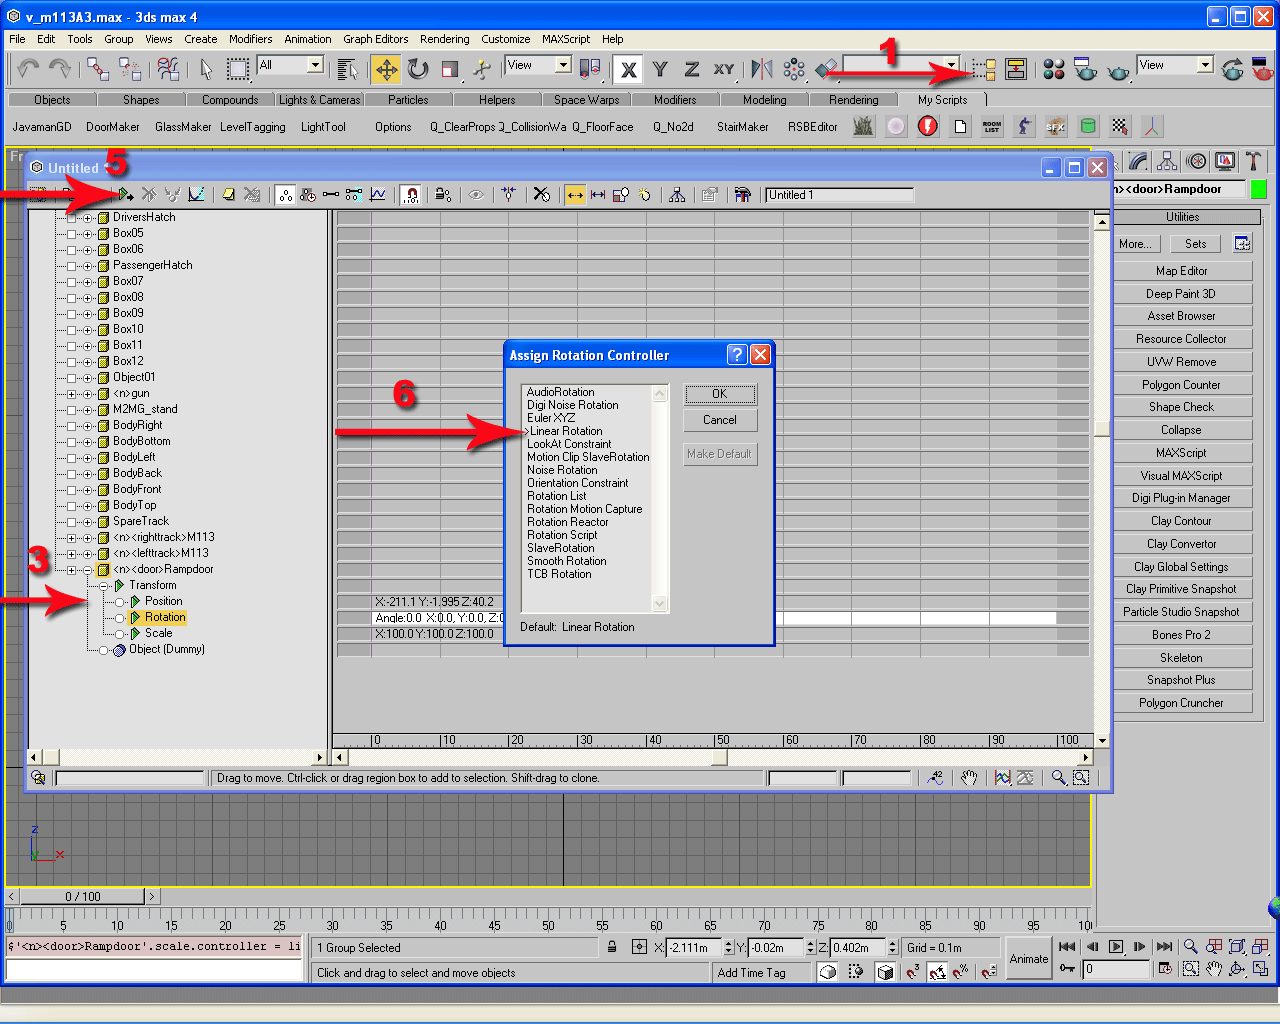
1. To do this open your Track View by clicking on the Track View button. On the left hand side in the Track View there is a thing called objects with a "+" sign in a square to the left of it.
2. Click on that plus sign to expand the list and locate the <n><door>Rampdoor by scrolling down the list. Once you have located the tag you should notice a square and a circle with a plus sign enclosed in them.
3. Click on the one with a circle and a plus sign to expand that list. Now you should see a green triangle with the word "Transform " just to the right of it and a plus sign in a circle just to the left of it.
4. Click on the circle with the plus sign to expand that list. Now you should see the three more green triangles with the words, "Position, Rotation, and Scale" respectively.
5. Left-Click on the word, "Rotation". and then go to the top of the window and click on the Assign Controller button. It is a green triangle. It will bring up a little pop-up window with a list of stuff to choose from.
6. Left-Click on Linear Rotation and then click on the Make Default button. Go ahead and do it for the Postion triangle and the Scale triangle.
The only animation that Ghost Recon supports is linear so don't bother with any of the other options.
Refer to the picture below:

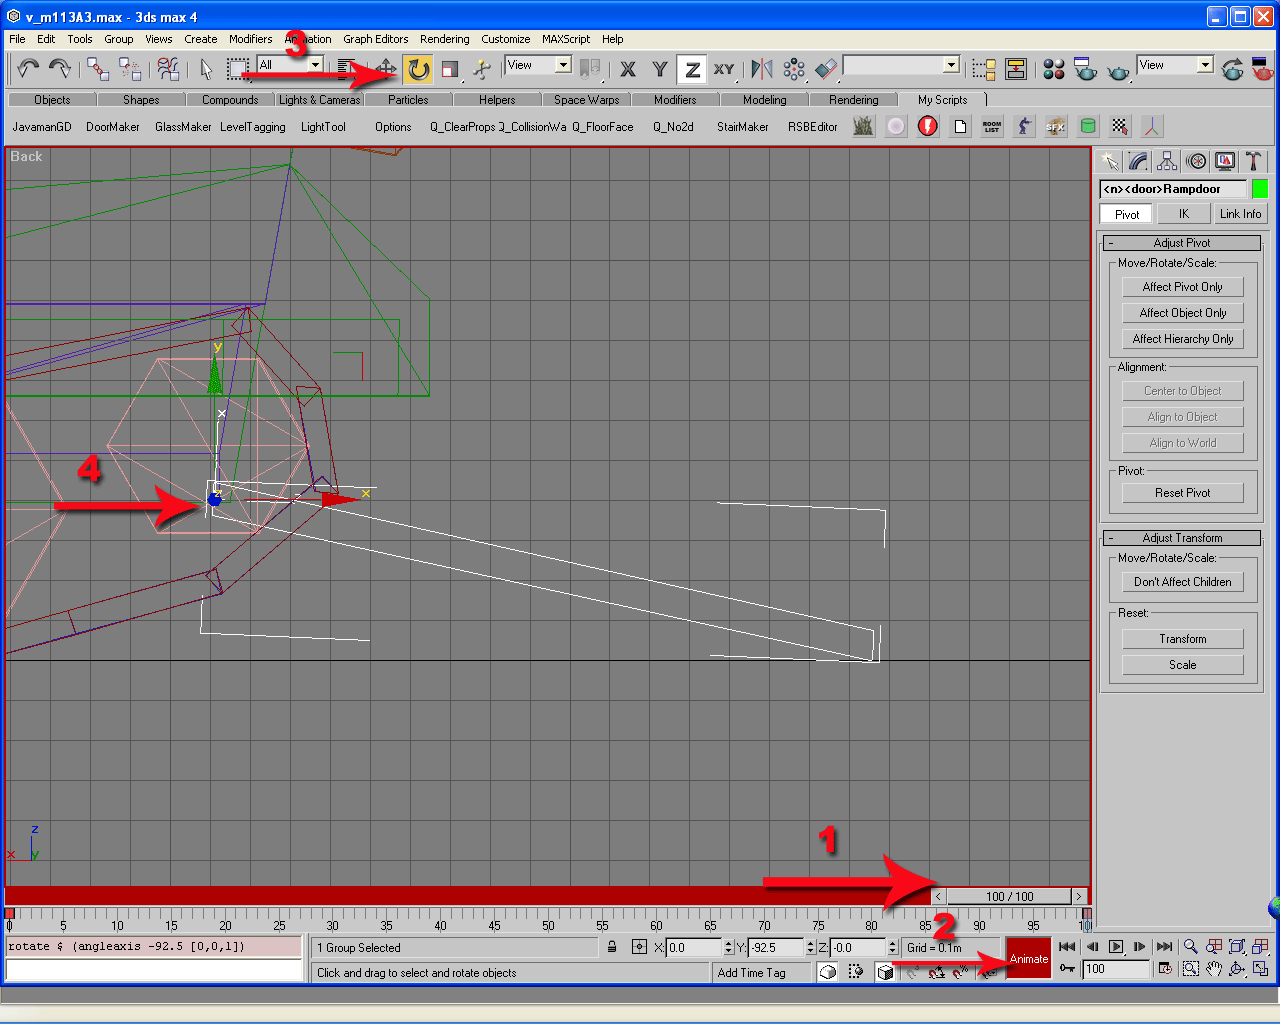
Go ahead and close this stuff up and get back to the viewport that you will be animating in. In my case either the Front or the Back. Set your anmation bar at the bottom to the desired frame that you want the door to be open. Keep in mind that Ghost Recon's frames per second vary from machine to machine depending on the end user's hardware configuration. I average from 60 to 90 frames per second depending on the map and mission. From my experience with this vehicle it took a second or two for the Ramp to drop when opened. I set my animation frame to 100. That should keep it in the one to two second time frame that I desire.
After you have set your Animation Bar, Click on the Animate button on the bottom of your screen. Then click on the Select and Rotate Tool button and rotate the door to it's full open posititon. Once the door is in it's full position click on the Animate button to turn off the animation. Repeat this process for every door that you want to apply animation to for the vehicle.
Refer to the picture below:

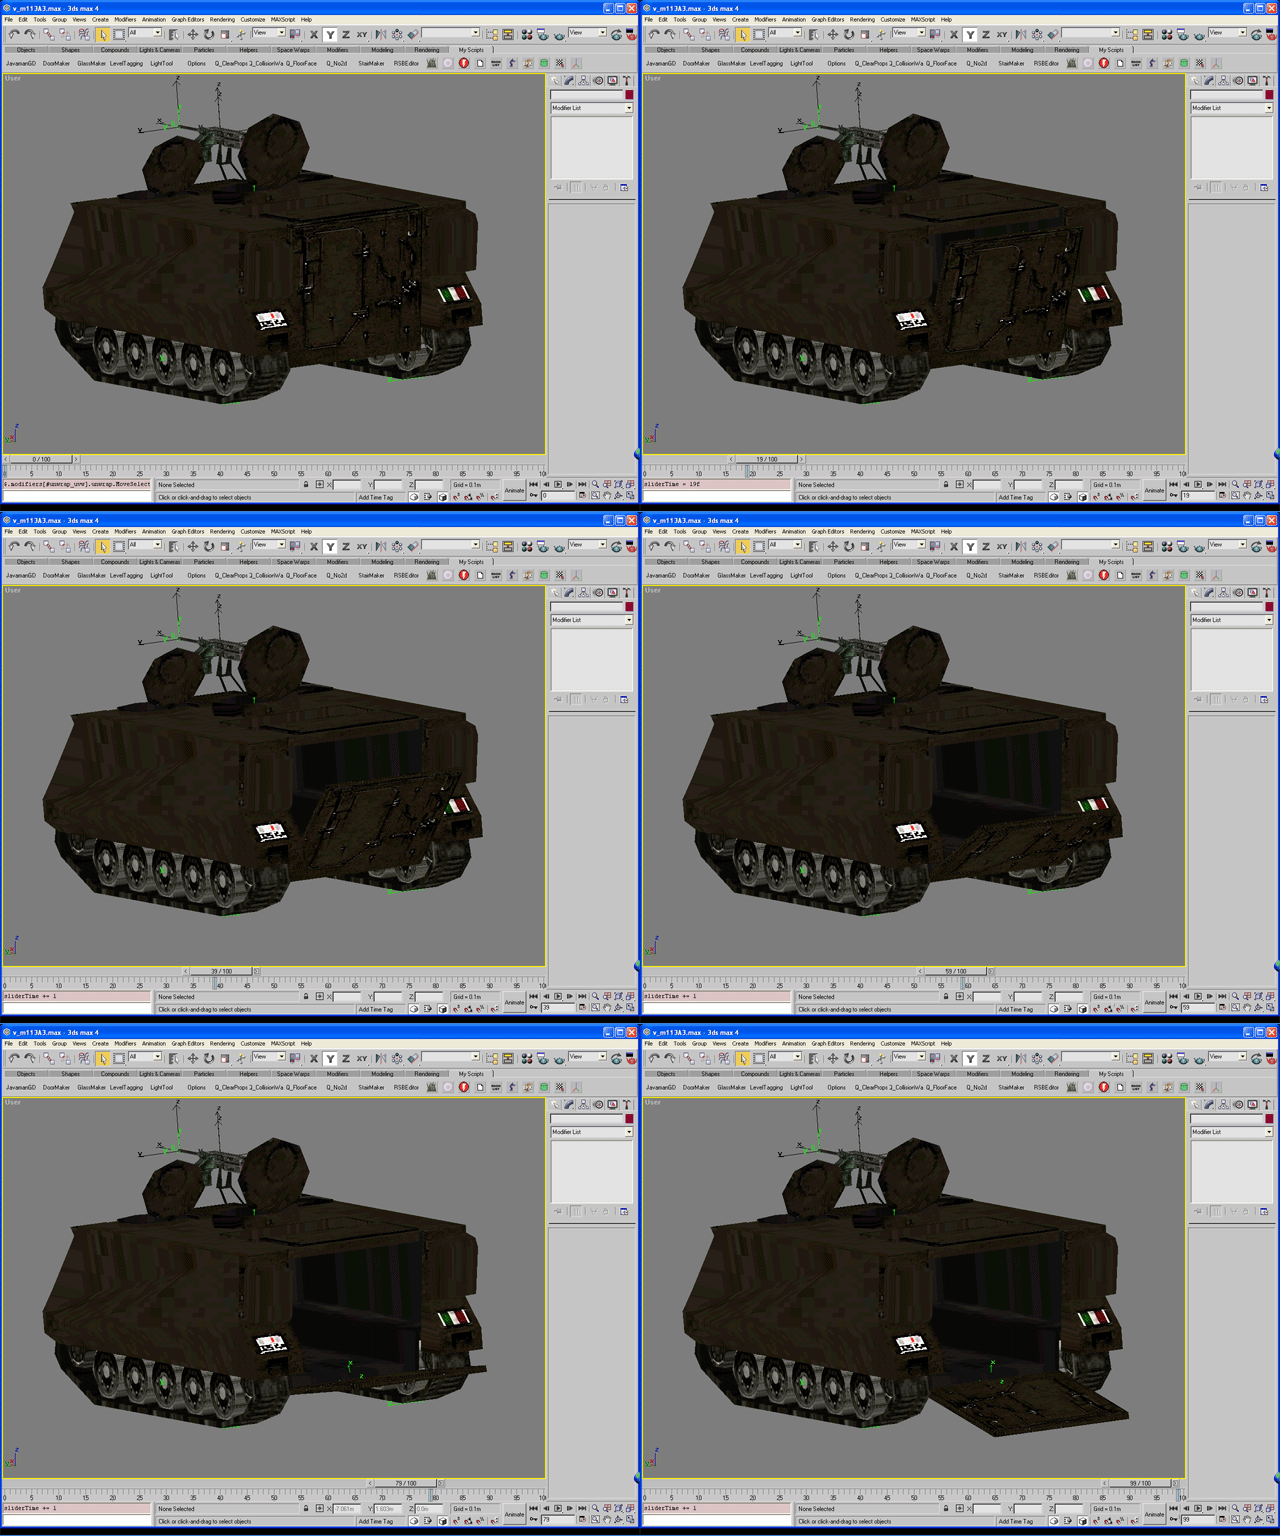
After you have finished the animation it is a good idea to check it to make sure it is what you want. Click on the play button on the bottom to watch your animation in action. When you are done click on the stop button. Once you're done with the doors, move on to the Turret section if your vehicle has a turret.